
2:18 MINUTES · UPDATED FEBRUARY 2026
QuikAuthor 101: Complete Dashboard & Navigation Guide
Master the QuikAuthor interface and learn how to navigate your workspace efficiently.
About this Tutorial
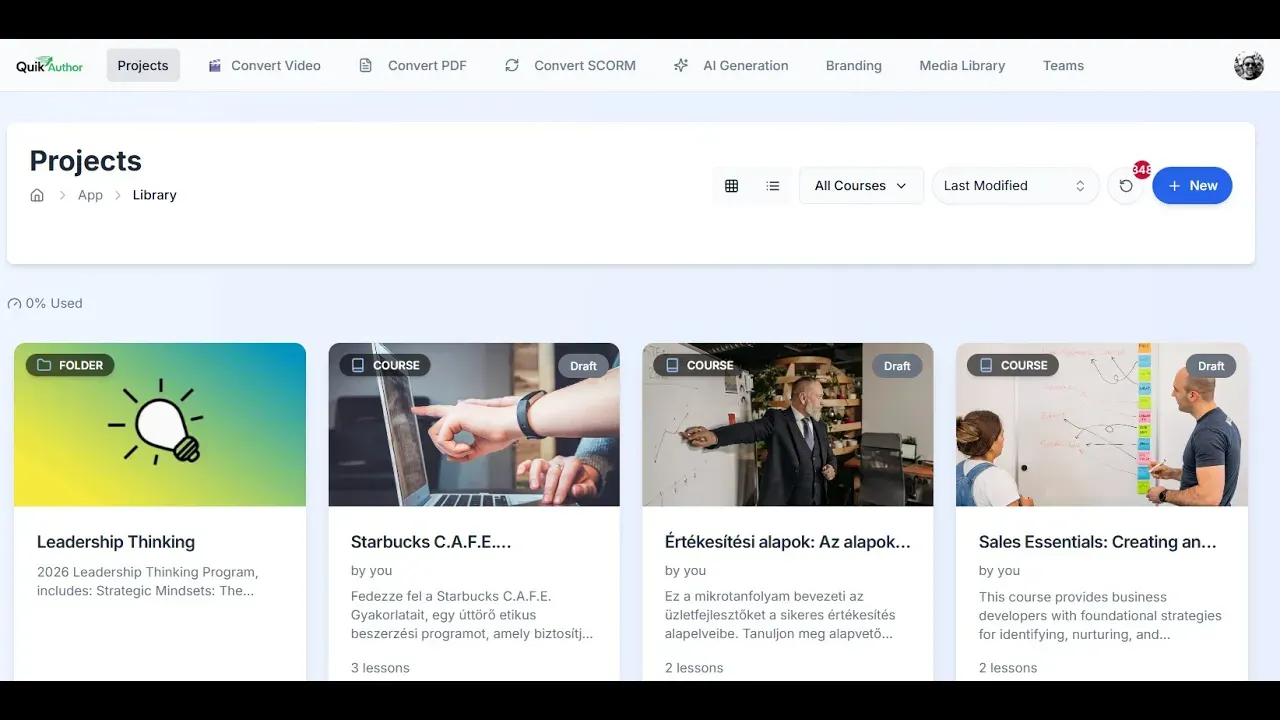
QuikAuthor's dashboard provides a centralised hub for managing your microlearning projects. In this tutorial, we demonstrate how to navigate the workspace, organise projects, and use the quick links area to start new AI-powered course projects through video, PDF, or SCORM conversion. This guide ensures you can find every tool needed to create, edit, and export SCORM-compliant content efficiently.
Next tutorial: QuikAuthor 102: Managing the Media Library & Stock Assets
Transcript
Hi, this is Jamie from QuikAuthor, and today we're going to have a look at navigation just to get started.
When you first come into your account, you're going to see that the projects area is blank.
The projects area is where you're going to find all of the courses that you've created.
You can create new courses and folders from this section.
There are two views available: the grid view we're looking at now, or a list view.
In the list view, you can move files into folders for easy sorting.
Along the top, we have several quick links for different capabilities.
We have the "Convert Video" tool, which we will explore in detail later on.
We also have "Convert PDF," which allows you to upload PDFs and review them before creating a course.
There is an experimental "Convert SCORM" feature currently used for EdApp conversion, though it may not be visible to everyone.
Next, we have the AI Generation area where you can create courses using prompts.
We also have the Branding area where you can set your specific design preferences.
You can choose from a variety of preset designs or update the colours to match your corporate branding.
You can change your fonts here, and we also support adding custom fonts.
The Logo area allows you to upload your own brand imagery.
You can also adjust button styles, such as the shape and overall look of the buttons.
Don't worry too much about Custom CSS, as that is primarily for more advanced users.
Finally, we have the Media Library where you can access all of your uploaded assets.
Your media is organised into folders and broken down by file type.
We also have team controls available for managing collaborators.
Across the top, you will find the profile area to view your current platform utilisation.
This is also where you can update your avatar, name, and account settings.